Deployment Setup
This section provides a guide to setting up and managing deployments.
Hardware Setup
Setup the Server
- Connect the server node to the server using the USB cable
- Connect the server to the router, using the Ethernet cable
- Connect the devices to the power supply.
Deploy the Nodes
Place a node in each room ensuring you make a note of where the nodes
Node Placement Tips
Registering a new deployment
Connect to the server
Connect to the wireless network, the network name will generally be that of the server. For example GAUSS or EINSTEIN.
To connect to a network on an Ipad, go to the setting page -> Wi-Fi and select the appropriate network. The image below shows an example of connecting to the tesla wireless network.
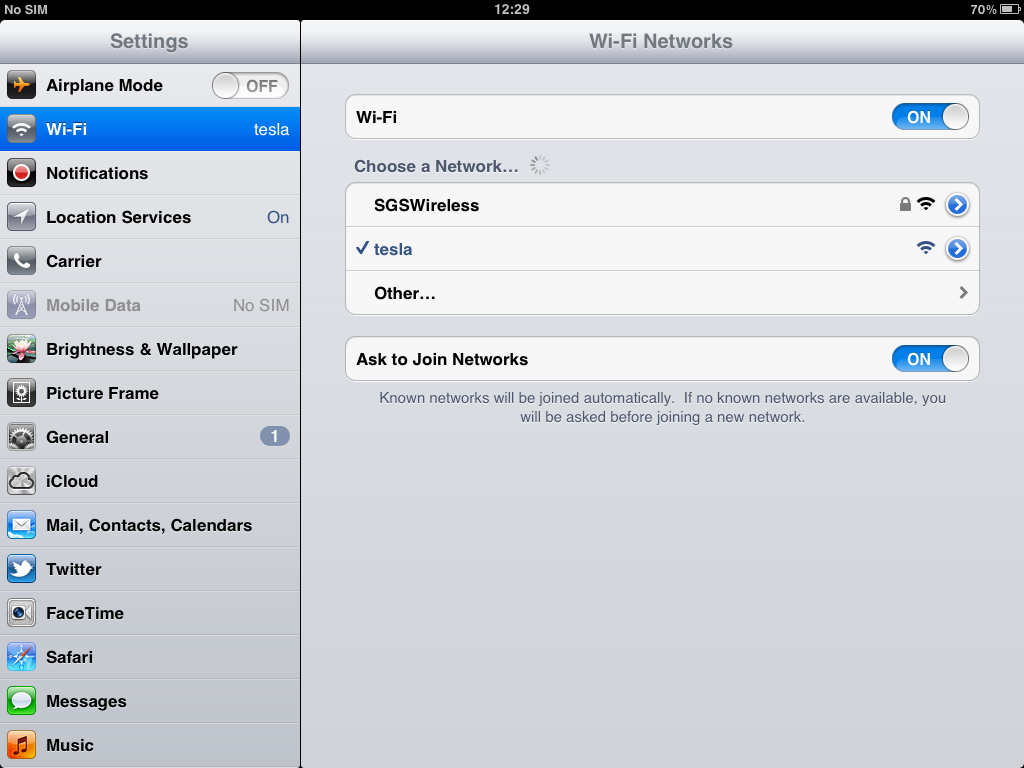
Connecting to a wireless network.
Open the Server Administration Web Page
Open the server administration page. The web address for this page will be <server>.local/webInterface/
Examples of the web address for a given server are:
| Server Name | URL |
| gauss | gauss.local/webInterface |
| einstein | einstein.local/webInterface |
| euler | euler.local/webInterface |
The web interface should display the following page.
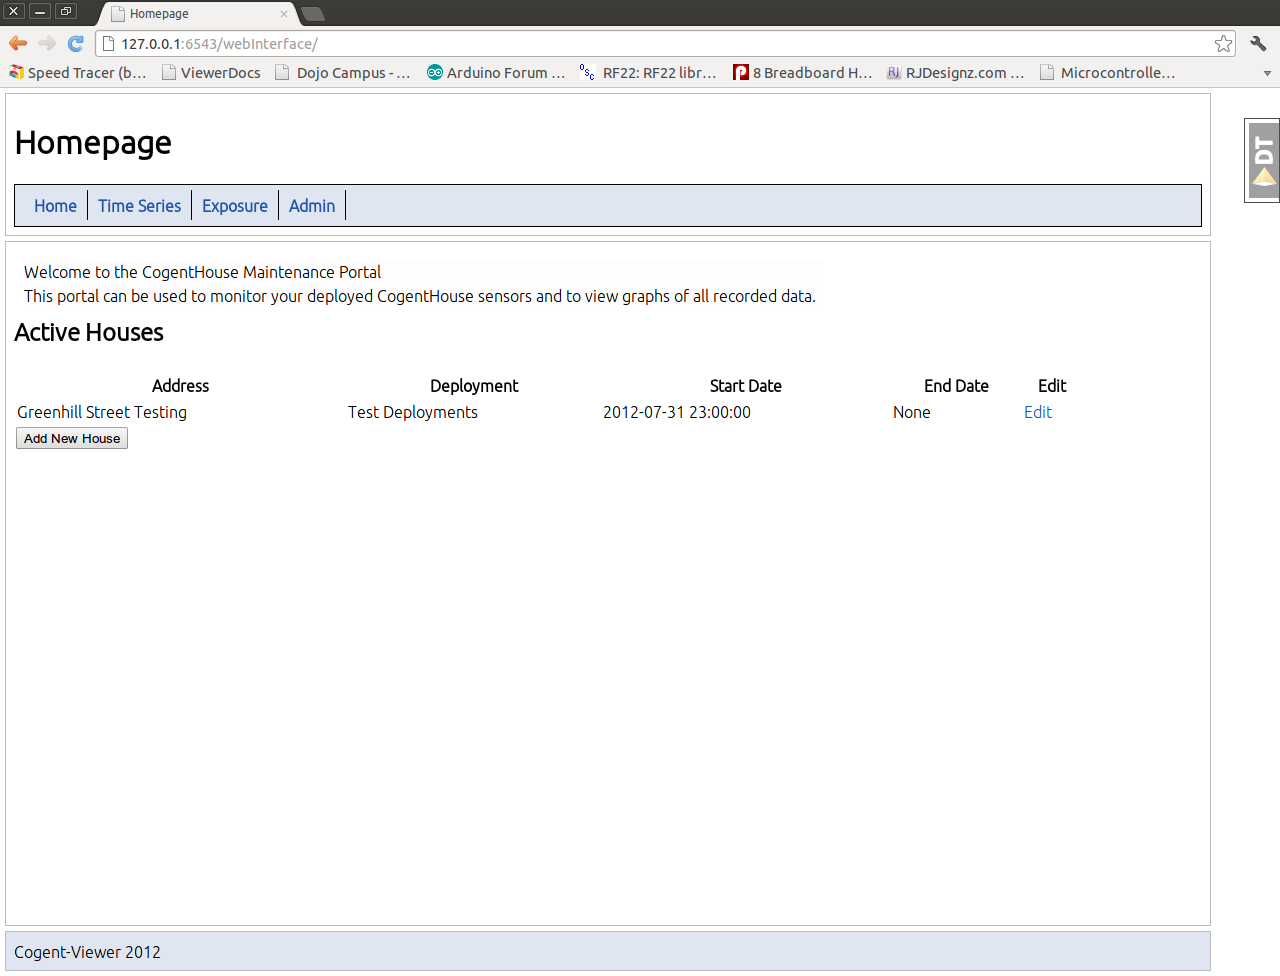
Connecting to the Homepage
To register a new house, click the add new house button
Note
If there are active deployments that have finished, you can use the edit function to close the deployment.
This should bring the add house page
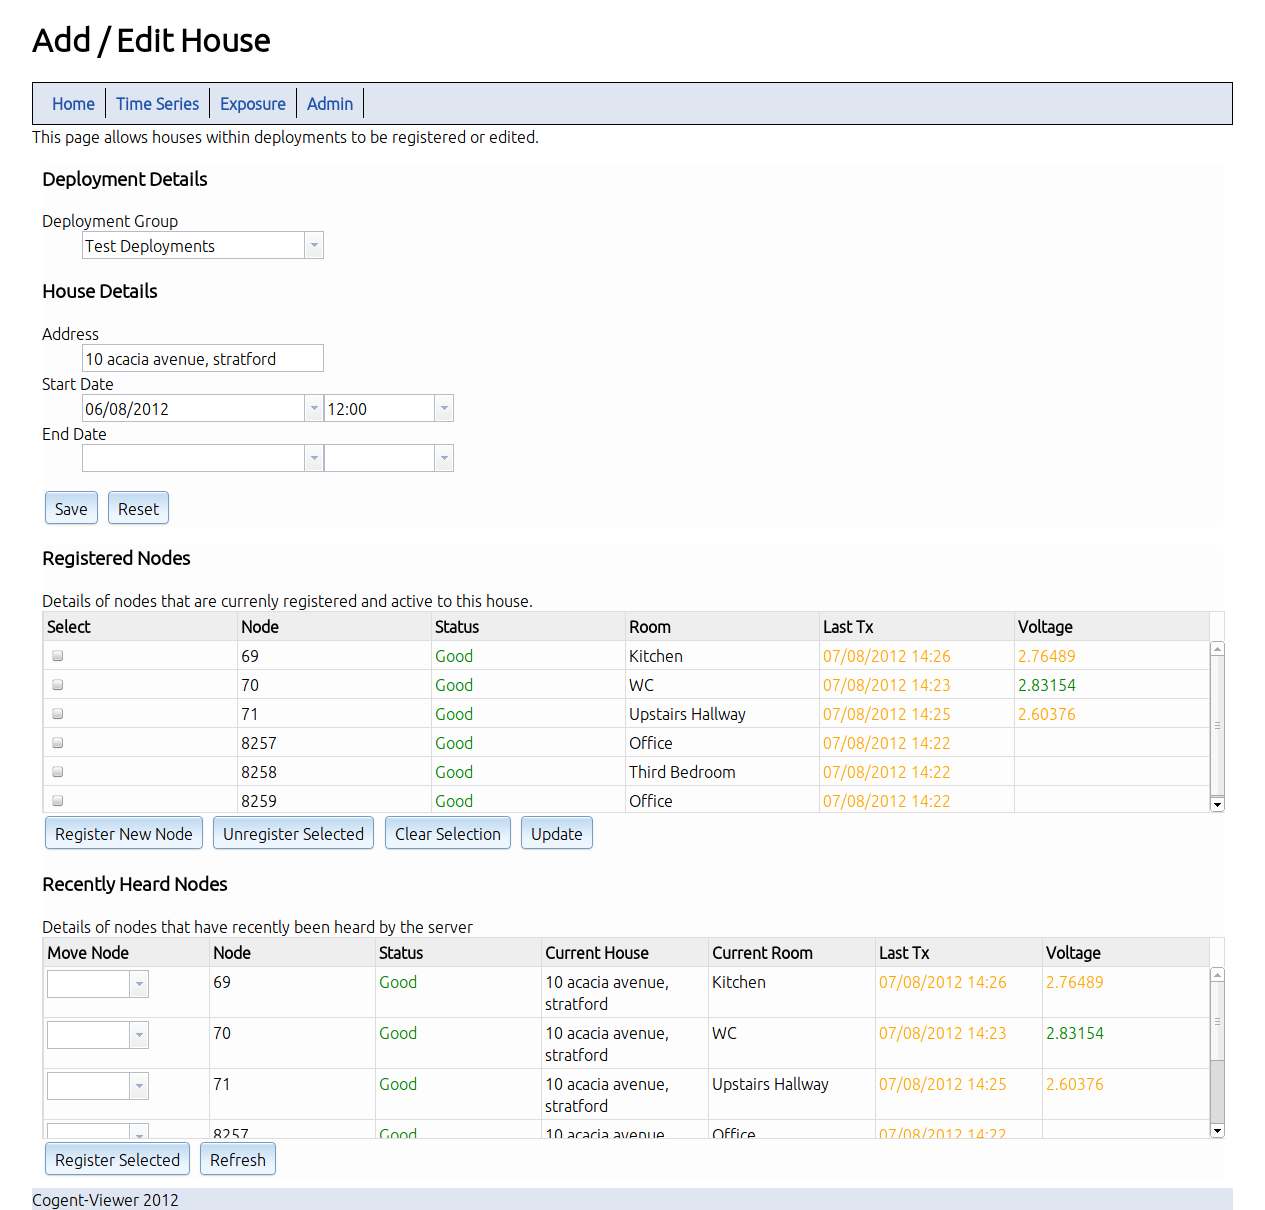
Add a new house
Complete / Edit the details of the new house and click save
- The deploymnent group is a logical grouping of deployments (ie Winter 2011)
- Start and End data correspond to when the nodes were deployed at this location If the house has no pre-aranged end date, this field can be left blank.
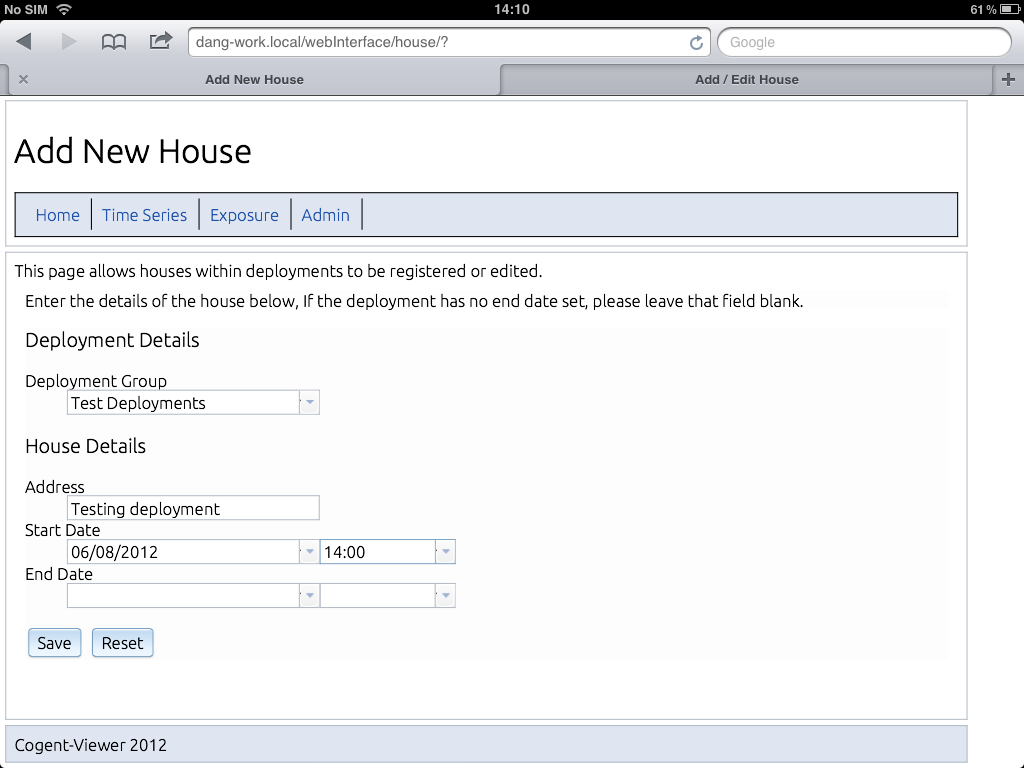
Registering a new house at 10 acacia avenue.
Register Deployment Nodes
Selecting Save should refresh the page with the following additional information
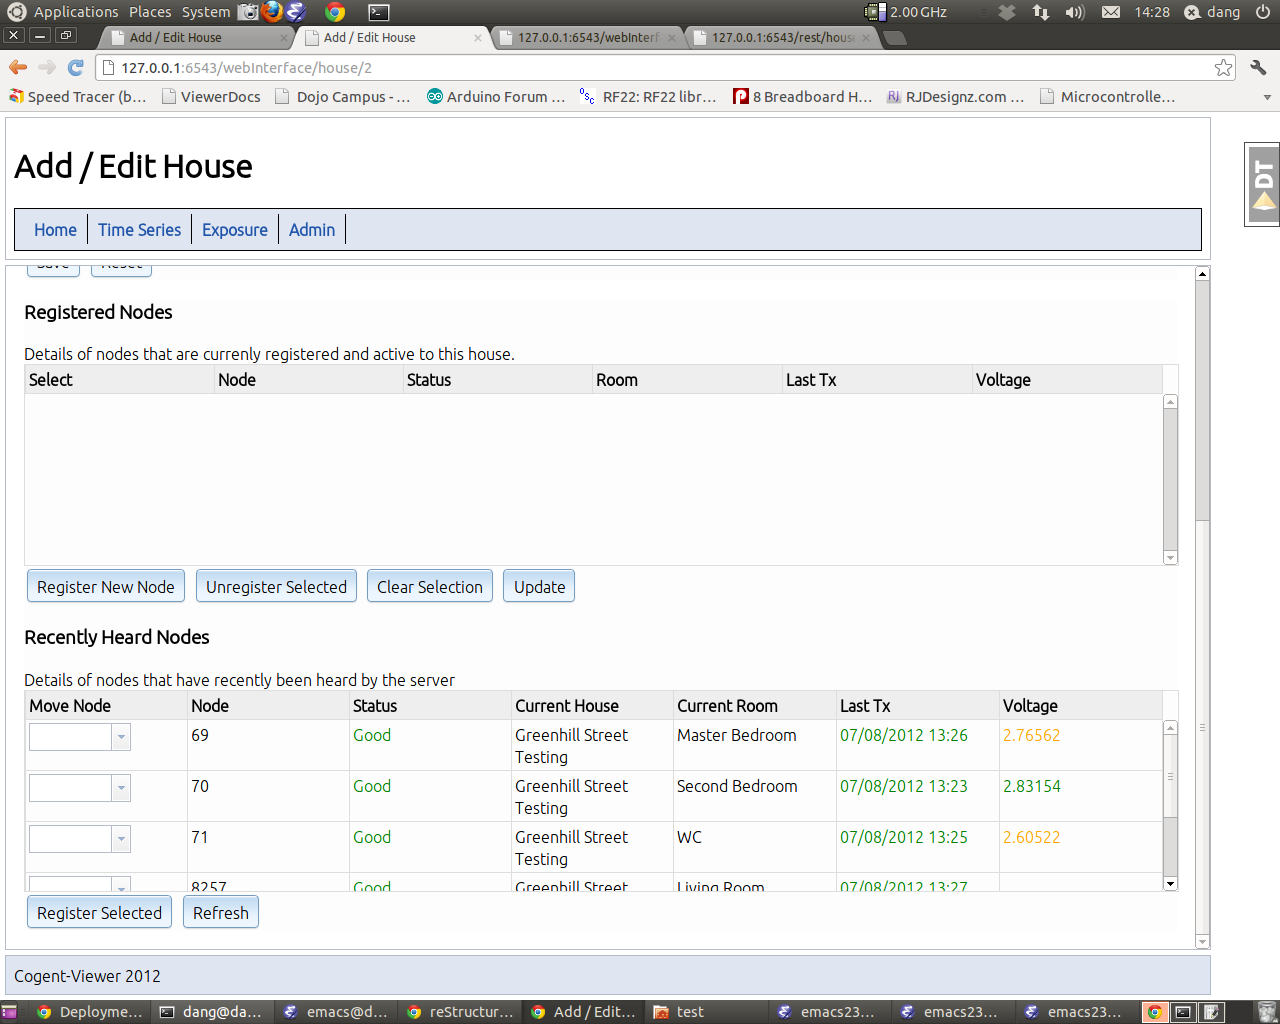
Registering new nodes to a house
Registered Nodes are those currently active within a deployment
- Recently Heard Nodes are those that the have transmitted data to the
server recently, along with information on their current deployment location
Note
- A Node can only be active in one house at any one time. If a node is missing
- from the registered nodes list you can use the recently heard nodes list to double check that is registered to the current property.
You now have two options to register nodes within a deployment.
Registering Individual Nodes
Click the Register New Node button. This will display the following dialog:
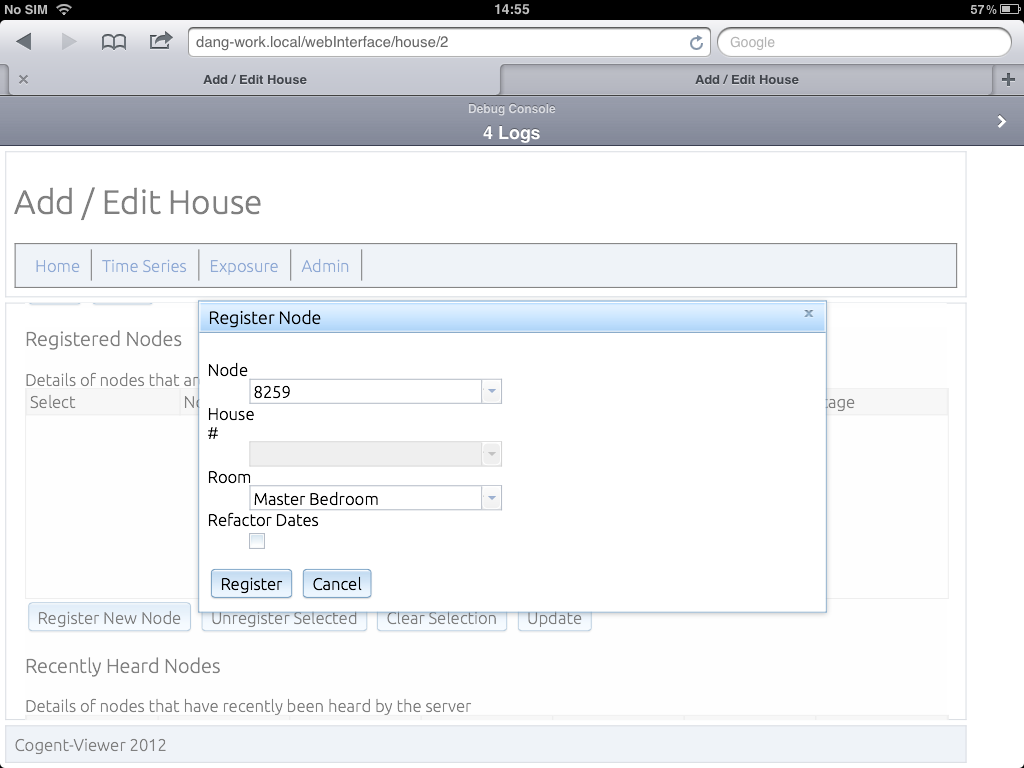
Registering an indivudual node.
The options are as follows:
Node
Select the Node ID you want to register from the drop-down list. The Node ID is the final number on the nodes label. For example, the node with label 2-5-0-69 has node id 69 If the node is not in the list, you can pre-register a node with the system by entering a new nodeId. This is useful in situations where a node has not yet communicated with the server.
Room
Select the room the node is located in from the drop-down list. If the room is not in the list, you can enter a new room type here.
Refactor Dates
This checkbox is an advances option that can be used when the deployment has been running for a period of time before nodes have been registered. When selected it registered all readings from this node between the deployment start and end dates to the given room.
Note
When Registering new rooms, make use of generic descriptions (For example Second Bedroom) This allows similar rooms to be compared across deployments.
Warning
Be careful when using the refactor dates checkbox, as it will re-register all readings between the house start and end date to the room within the house. This can cause readings for one property to be assigned to another home.
Registering Multiple Nodes at the Same time
Most of the time, a deployment will involve moving a full set of nodes between houses. In this case, the recently heard nodes list allows us to register multiple nodes at the same time.
For each node you wish to register in a new location, modify the Move Node dropdown box, then click the Register Selected button. This will re-register those nodes to these locations within the current house.
Registering Multiple Nodes
Checking Node Status
The registered nodes screen also gives an overview of the current node status, Before leaving a deployment, check that all nodes have a GOOD status, and sufficent battery voltage.
It is recommended that the batteries are changed when they reach 2.4 volts.
Checking node status.